Learn
Help docs
Get in touch
© Dovetail Research Pty. Ltd.
TermsPrivacy PolicySurface themes with highlights
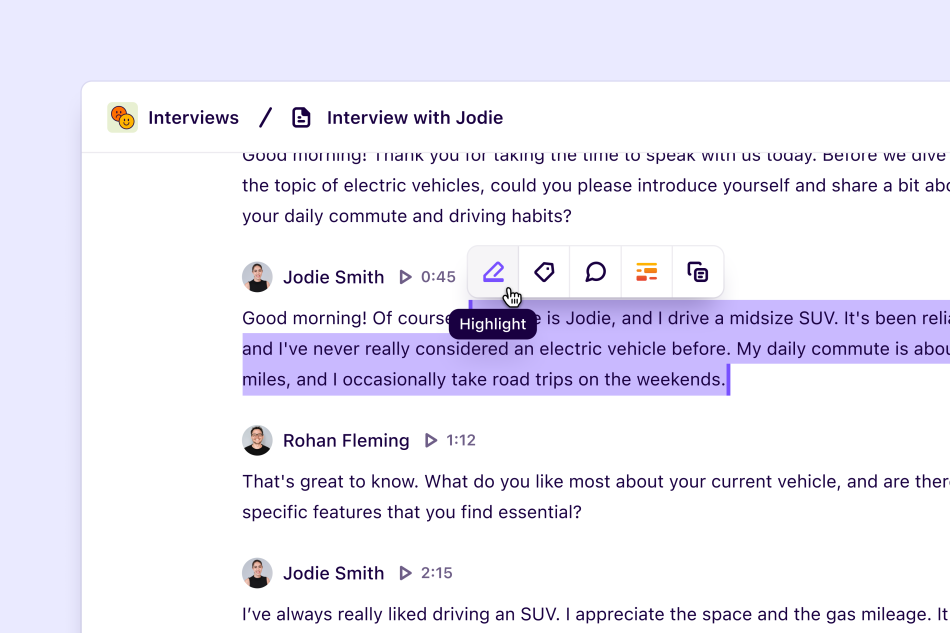
The power of Dovetail lies in highlighting and breaking down key information in text, documents, or video transcripts. These highlights can be grouped under tags, embedded, and shared in insights to connect your findings back to the raw data collected.
Highlights made in transcripts from video and audio content create individual, searchable clips. These clips are a powerful way to share stories about your research and bring your customers into the room.
Table of contents
Create a highlight
To create a highlight, select a section of text in a note and select Highlight from the action menu.
If you’re a power user, you can quickly create highlights by selecting a section of text and then pressing Tab on your keyboard to cycle through the action menu.
View all highlights within a note
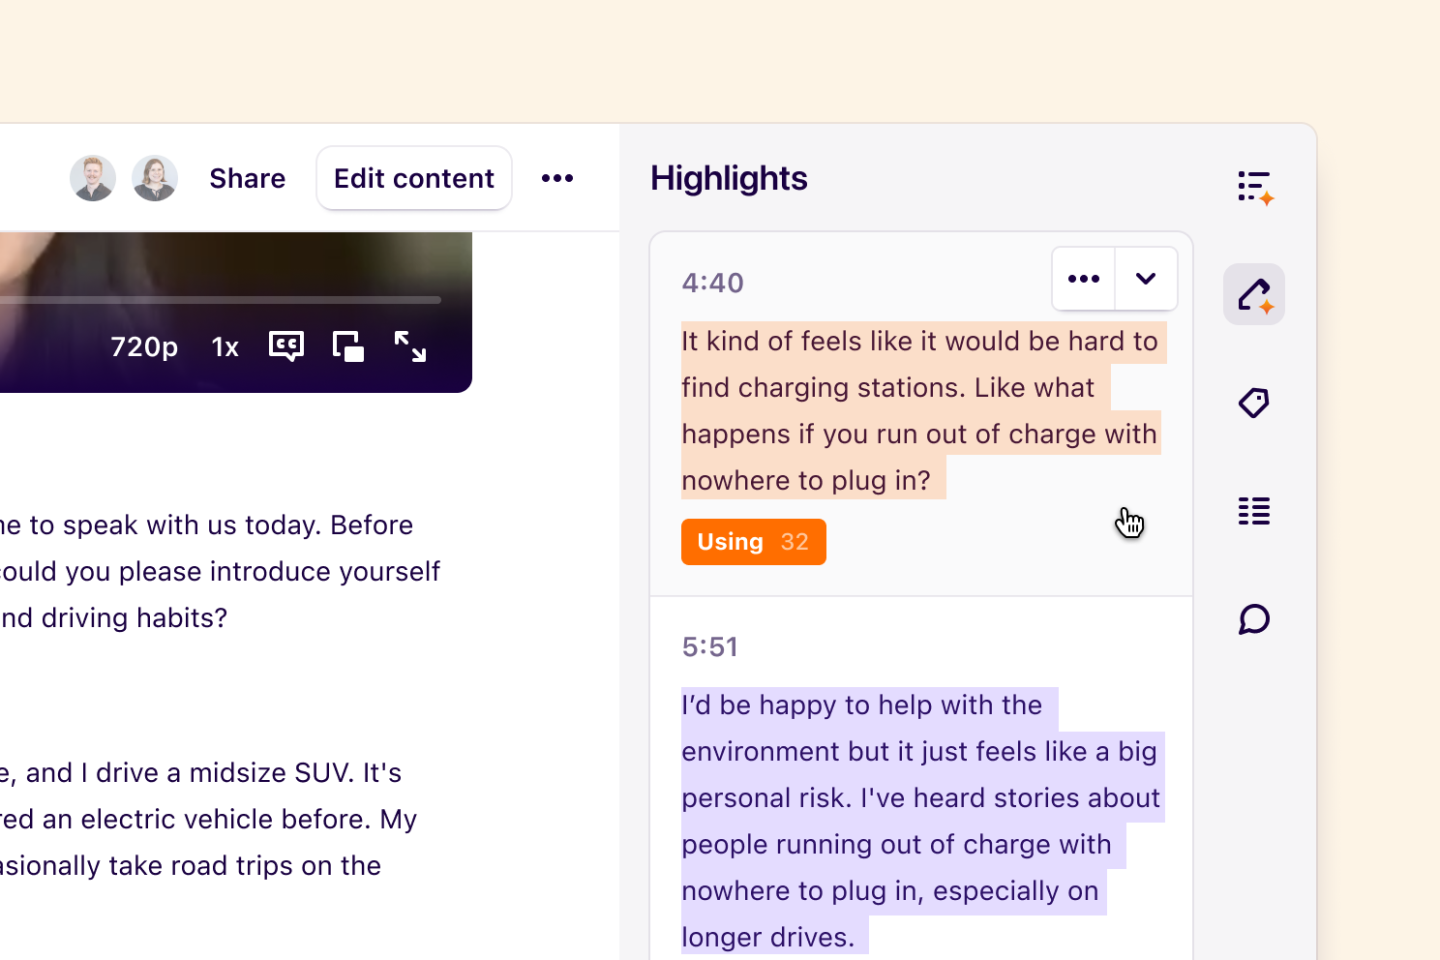
You can quickly view all highlights within a note from the note sidebar. Simply open the highlights tab by pressing the highlight icon on the right-hand side of a note. Here, you'll see all highlights in the order that they appear on the note.
Clicking on a highlight in the note sidebar will scroll the note to the relevant section of the note content.
Automatically create suggested highlights
Professional and Enterprise only
This feature is only available on Professional and Enterprise plans. Check out our pricing page for more information about our plans available.
View plansLet Dovetail automatically highlight your note content. Simply open the highlights tab in the note sidebar and press Suggest.
Refine your suggested highlights
By default, highlights will be suggested based on general relevancy. If you'd like to refine the suggestions further, you can add an optional prompt by clicking on the configuration icon next to the suggest button.
Approve and reject suggestions
Approving or rejecting suggested highlights can be done by clicking on the suggestion and pressing Accept or Decline.
When hovering over the accept button, you'll also see a generated reason why the suggestion was made!
Resize your highlights
You can adjust the start or end position of your highlights by clicking on the highlight and moving drag handles.
Highlight text in documents
When you upload a document into a note, you can highlight and tag content within that document in the same way you would with text and transcripts.
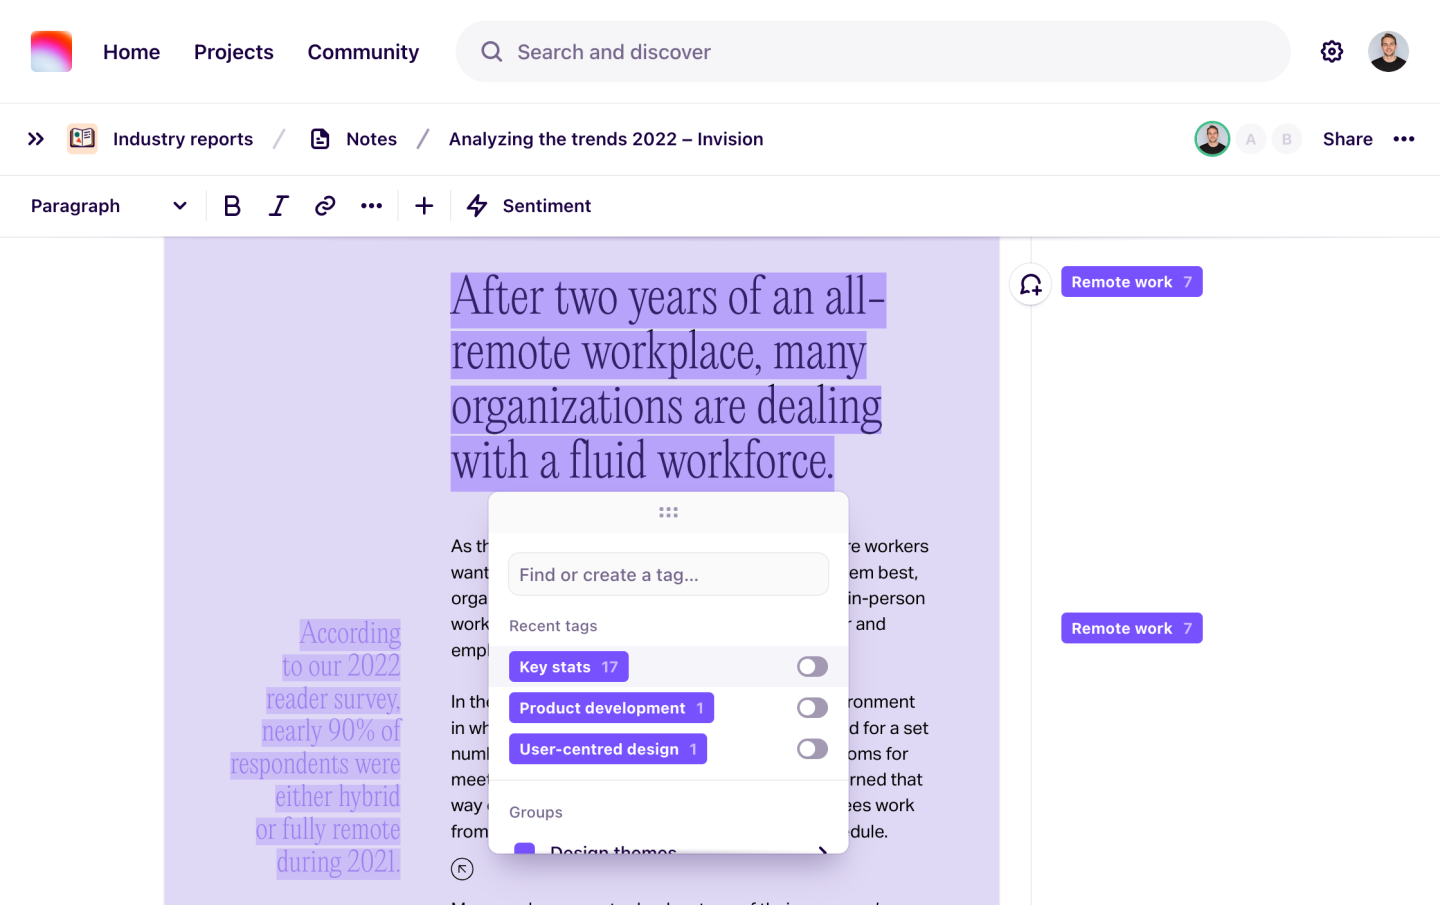
At this time, highlights in a document cannot be resized once they’re created. If you need to make any changes, you must remove the highlight and create it again.
You can quickly share a highlight with your team while reviewing your note data.
To do this, click on your highlight and select Share.
From there, select the Copy link to highlight and share this link in Slack, Teams, Notion, or other available tools for others to preview.
Group highlights under a tag
Managers and contributors can create tags within a project to group their highlights. A single highlight can have one or many tags associated with it, and a single tag can have many highlights associated with it.
Tags can be created from two places:
Within a note: Drag over a section of text within a note, and select Tag from the action menu. From there, you can create a new tag to group your highlight under.
On a tag board: By opening a tag board, you can create a new tag by pressing + New tag from any group within the board.
Highlight and tag multiple notes at once
You can highlight and tag multiple notes in bulk for high-volume analysis in your project. This is ideal for NPS or survey results that are short-form responses.
To do this, open a note view and click search in the top right or filter to find the content you’re looking for.
From there, hover over the relevant content and select the check box of notes you wish to tag. The bulk actions menu will appear at the bottom once selected.
Click Add tag. This will highlight and tag all text content within the note.
Analyze the sentiment of your data
Sentiment analysis uses AI to analyze sentiment within data in a note. Sentences featuring strong sentiments will be highlighted and tagged as Positive or Negative.
By default, the analysis is conducted on the whole note. You can also run sentiment analysis on sections of text within a note.
In a new note
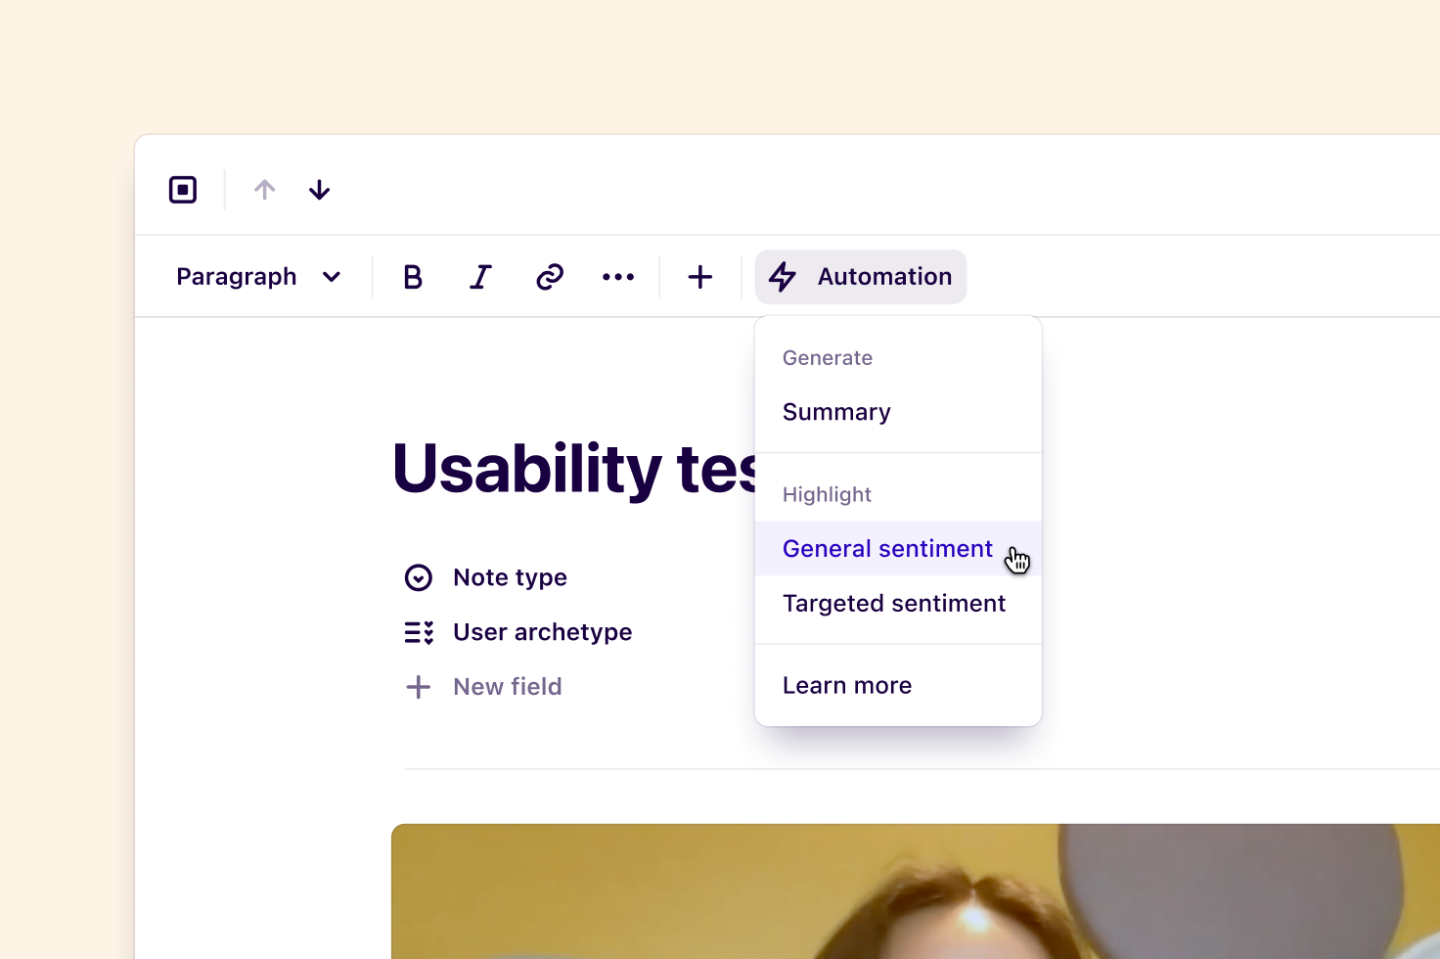
To run sentiment analysis on an entire note, click Automation > General or Targeted sentiment from the toolbar.
To run sentiment analysis on a specific section within a note, highlight the text and select Automation > General or Targeted sentiment.
Supported languages
Automatic sentiment analysis currently works on text in the following languages: Arabic, Chinese (Simplified), Chinese (Traditional), English, French, German, Hindi, Italian, Japanese, Korean, Portuguese, Spanish.
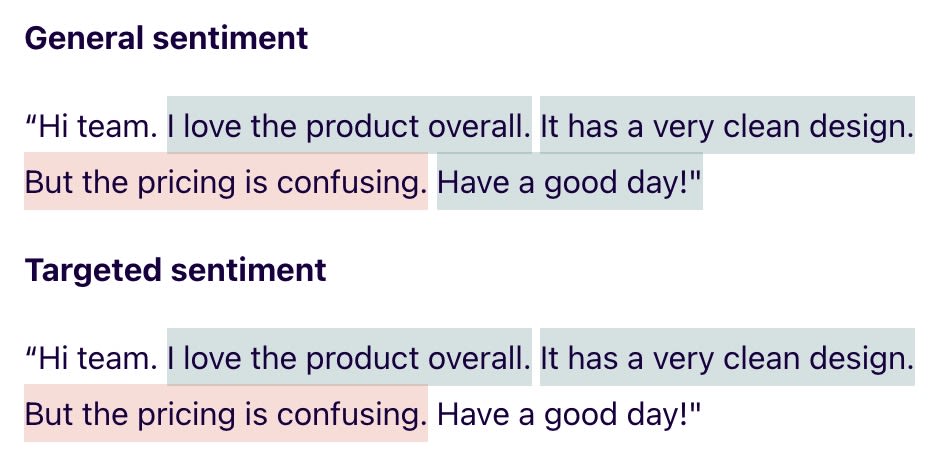
General sentiment looks for any words that have strong positive or negative sentiment.
Targeted sentiment is similar to general sentiment but looks for a target for the sentiment. If it isn’t clear what the sentiment is referring to, it ignores it.
Some things to note when using sentiment analysis:
It’s safe to run sentiment analysis again on a page - it won’t double-tag any sentences that it has already tagged.
Sentiment analysis only works on strong sentiments, so running it on your page may result in no highlights being created if the language used isn’t strong enough.
Sentiment analysis runs in the background so you can close the note or navigate away without interrupting the analysis.
On import
Automatic sentiment analysis can be enabled when you import data into Dovetail using any of the following methods:
FAQs
What languages do you support for sentiment analysis?
Automatic sentiment analysis currently works on text in the following languages:
Arabic, Chinese (Simplified), Chinese (Traditional), English, French, German, Hindi, Italian, Japanese, Korean, Portuguese, Spanish.
I'm not able to highlight and tag my note. How can I fix this?
There may be a few reasons for this!
Your note may be locked from editing. The ability to edit a note can be toggled on/off in the Actions (•••) menu in the top right corner of the note page.
You may not have the right workspace role. Reach out to your workspace's admin to update your access to Manager or Contributor to edit project work in the workspace.
You may not have the right project access to edit the project. Check the project's Share settings to review your access and reach out to someone with Full access to update your access.
Give us feedback
Was this article useful?
Next article
Quantify data with charts
Log in or sign up
Get started for free
or
By clicking “Continue with Google / Email” you agree to our User Terms of Service and Privacy Policy
